Whether you’re preparing pastries, kneading dough, or whisking egg whites, mastering your kitchen mixer is an essential skill. In ‘Kitchen Mixer Mastery: Tips for Home Bakers’, you’ll discover how to get the most out of this versatile appliance.
You’ll learn everything from understanding its key components, maintaining and cleaning your kitchen mixer, to choosing the right attachments. We’ll guide you through perfecting mixer speed control, share essential baking recipes, troubleshoot common mixer problems, and even help you expand your baking horizons.
So, let’s demystify your kitchen mixer and elevate your baking to a whole new level.
Understanding Your Kitchen Mixer
You’ve got to understand your kitchen mixer’s functions and features to truly master home baking. It’s not just a tool to combine ingredients; it’s a time-saving device that can elevate your creations to professional standards.
Firstly, let’s talk about the different settings of your stand mixer UAE. They’re not there for show; each has a purpose. The low speed is perfect for mixing dry ingredients to avoid a cloud of flour on your counter. Middle speeds are ideal for combining wet and dry ingredients thoroughly. The high speeds? They’re essential for whipping cream or egg whites to fluffy perfection.

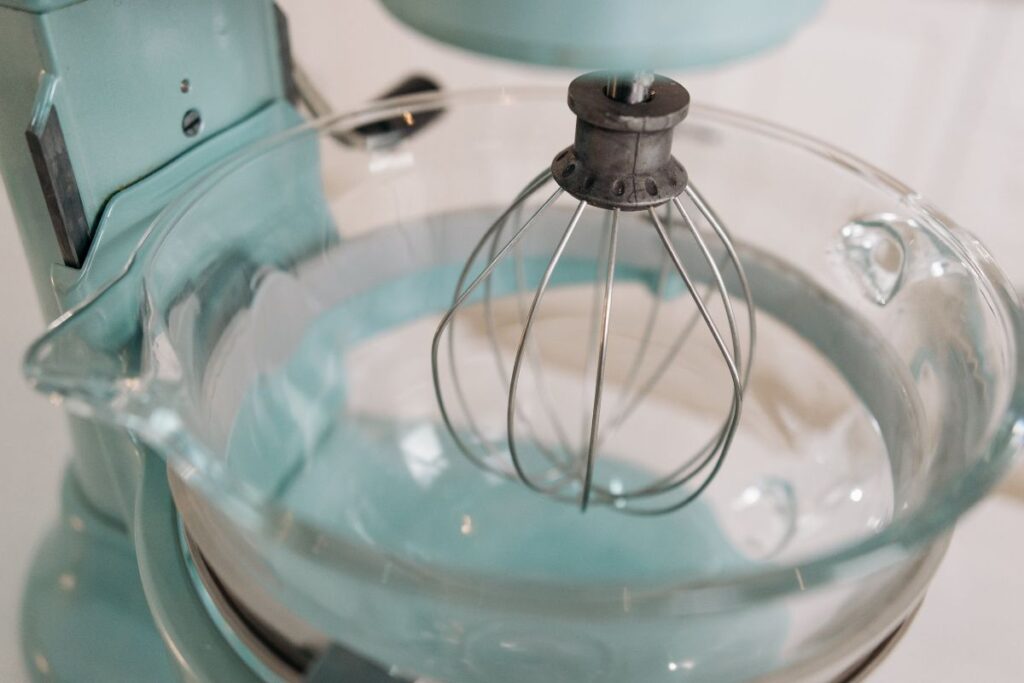
The attachments also have their roles. The flat beater is for creaming butter and sugar or mixing batter. The wire whip is your best friend for anything that needs aeration, like meringue. The dough hook? It’s the secret weapon for kneading bread dough without breaking a sweat.
Knowing when to use the mixer is equally important. It’s not always the best tool for the job. Some recipes require a gentle hand-mixing to avoid overworking the ingredients.
Get to know your mixer, its strengths, quirks, and capabilities. It’s a key player in your baking team. Don’t underestimate it.
Key Components of a Mixer
Now that you’re familiar with your mixer’s functions, let’s delve into its key components and understand their significance in your baking journey.
- The Motor. It’s the heart of your mixer. The power of the motor determines how effectively it can mix. Remember, a high-wattage motor isn’t always necessary for light tasks, but it’s crucial for tough doughs.
- The Bowl. This is where the ingredients are mixed. The size and shape of the bowl can impact how well the ingredients are combined.
- Mixer Attachments. These include whisks, dough hooks, and beaters. Each attachment has its specific use and can drastically affect the outcome of your baking project.
- The Speed Settings. These control how fast the mixer beats, whips, or kneads. Higher speeds aren’t always better; a slow, steady speed often gives better results.
- The Tilt Head or Bowl Lift. This feature makes it easier to add ingredients and change attachments. A tilt-head mixer is generally easier to use, but a bowl lift mixer provides more stability, especially for heavy doughs.
Understanding these key components will empower you to use your mixer more effectively and will surely elevate your baking game.
Mixer Maintenance and Cleaning
After mastering the key components of your mixer, it’s time to dive into the essential routine of maintenance and cleaning to ensure its longevity and optimal performance. It’s not as daunting as it sounds. With a bit of care, your mixer can serve you well for years.
Firstly, after each use, wipe down the exterior with a damp cloth to prevent buildup of dust and food particles. Don’t forget the speed control and power switch. Don’t use abrasive cleaners, as they can scratch the surface. Always disconnect the mixer from the power supply before cleaning.
Next, clean the beaters and dough hooks with warm, soapy water. If they’re dishwasher safe, you can pop them in the machine. Avoid immersing the mixer in water or running it under the tap. If the cord gets dirty, wipe it with a damp cloth.
Every six months, it’s a good idea to check the motor brushes. Look for excessive wear or damage. If you’re not comfortable doing this yourself, consider getting a professional to do it.
Choosing the Right Attachments
Choosing the right mixer attachments can significantly enhance your baking prowess, so it’s crucial you understand which tool to use for different tasks. Here’s a simple guide to some of the most common mixer attachments and when to use them:
- Flat Beater: Ideal for general mixing tasks like creaming butter and sugar, this attachment is a jack of all trades.
- Wire Whip: Want to whip cream or egg whites? This is your go-to tool. It’s designed to incorporate the maximum amount of air into your mixtures.
- Dough Hook: When it’s time to knead dough, this attachment will save your arms a workout. It’s perfect for bread, pizza, and pastry dough.
- Flex Edge Beater: This tool scrapes the sides of the bowl as it mixes, eliminating the need for you to stop and scrape it yourself.
- Pouring Shield: Although not technically an attachment, it’s a handy tool to prevent splattering when adding ingredients.
Knowing when to use each attachment isn’t just about efficiency; it’s about achieving the best possible results.
Now that you’ve mastered the art of choosing attachments, let’s move on to perfecting mixer speed control.
Perfecting Mixer Speed Control
Understanding how to control your mixer’s speed can make a world of difference in your baking results. It’s not just about turning it on and off. It’s about knowing when to speed up, slow down, and stay steady. Let’s break it down.
Start with a low speed; it’ll prevent dry ingredients from creating a cloud in your kitchen. Gradually increase the speed as the ingredients start to incorporate. You’re aiming for a smooth, consistent blend, not a whirlwind of chaos.
Different recipes require different speeds. For instance, bread dough needs a medium speed to develop gluten properly, while delicate cake batters thrive at lower speeds to avoid over-mixing. When whipping cream or egg whites, a high speed is necessary for that fluffy, airy texture.
Remember, too, that speed isn’t static. It’s okay to shift up or down as needed during the mixing process. Just be mindful of how your mixture reacts. Overmixing can lead to tough, dense baked goods.
Mastering mixer speed control is an art, one that adds precision to your baking. So take the time to learn your mixer’s nuances. The payoff will be delicious. Trust me, it’s worth it.
Essential Baking Recipes to Try
Now that you’ve mastered the art of mixer speed control, let’s dive into some essential baking recipes you should try. These are classics that every baker, from beginner to seasoned pro, should have in their repertoire.
Here are five essential baking recipes to test your mixer mastery:
- Classic Chocolate Chip Cookies: This is a baking staple. With your newfound skills, you’ll have perfectly mixed dough, ensuring a cookie that’s chewy on the inside and slightly crisp on the outside.
- Fluffy White Bread: This recipe will test your kneading skills. The result should be a light and airy loaf, perfect for sandwiches or toast.
- Fudgy Brownies: Here, the challenge lies in achieving a rich, fudgy texture. Over-mixing can lead to cakey brownies, so watch your speed!
- French Macarons: These delicate cookies require precision and a gentle hand when mixing. Your mixer skill will play a vital role in achieving the perfect ‘feet’.
- New York-Style Cheesecake: This dense, creamy dessert needs a smooth, well-blended batter. Your mixer speed control will prevent over-beating and cracking.
Troubleshooting Common Mixer Problems
While you’re mastering these essential baking recipes, you might encounter some common mixer problems, but don’t let that discourage you. Often, these are minor glitches you can fix yourself with a little troubleshooting.
Firstly, if your mixer isn’t turning on, check the power source. It’s easy to forget to plug it in or the outlet may not be functioning. If that’s not the issue, it could be a problem with the motor. In which case, it’s best to get it checked by a professional.
If your mixer is overheating, it might be working too hard. You could be overloading it with too much dough or running it for too long at high speeds. Simply reducing the load or speed should help.
Are the attachments not fitting properly? Check if they’re the right ones for your model. Also, ensure they’re correctly inserted and locked into place.
Lastly, if your mixer is noisy or vibrating excessively, it might need a thorough cleaning or the screws could be loose. Cleaning it regularly and tightening the screws can alleviate these issues.
Expanding Your Baking Horizons
With your mixer glitches behind you, it’s time to venture into the delightful world of advanced baking. Now that you’ve mastered the basics, you’re ready to expand your baking horizons. This doesn’t mean you’ll be reinventing the wheel; rather, you’ll be adding layers of complexity to your existing skills.
Here are five areas you can experiment with:
- Global Recipes: Step outside your comfort zone. Try baking specialties from around the world. French macarons, Italian cannoli, or Australian lamingtons could be your next challenge.
- Special Diets: Accommodating dietary restrictions can be a fun challenge. Try your hand at gluten-free, vegan, or keto baking.
- Savory Baking: Move beyond the sweet. Quiches, scones, and sourdough bread are a few savory items to add to your repertoire.
- Decorating Techniques: Up your presentation game. Learn piping techniques, fondant work, or cake painting.
- Baking Science: Understand the science behind baking. Know why your dough rises or why your cookies spread.
Conclusion
Now you’ve got the inside track on kitchen mixer mastery. Imagine the satisfaction as you listen to the steady hum of your well-oiled machine, effortlessly blending and kneading.
Picture the smiles around your table as they bite into fresh, homemade bread or the perfect chocolate chip cookies. With this knowledge, you can tackle any recipe, troubleshoot any issue, and expand your baking repertoire.
Your kitchen mixer isn’t just a tool—it’s your ticket to homemade heaven. Enjoy the ride
Images courtesy of unsplash.com and pexels.com and vecteezy.com